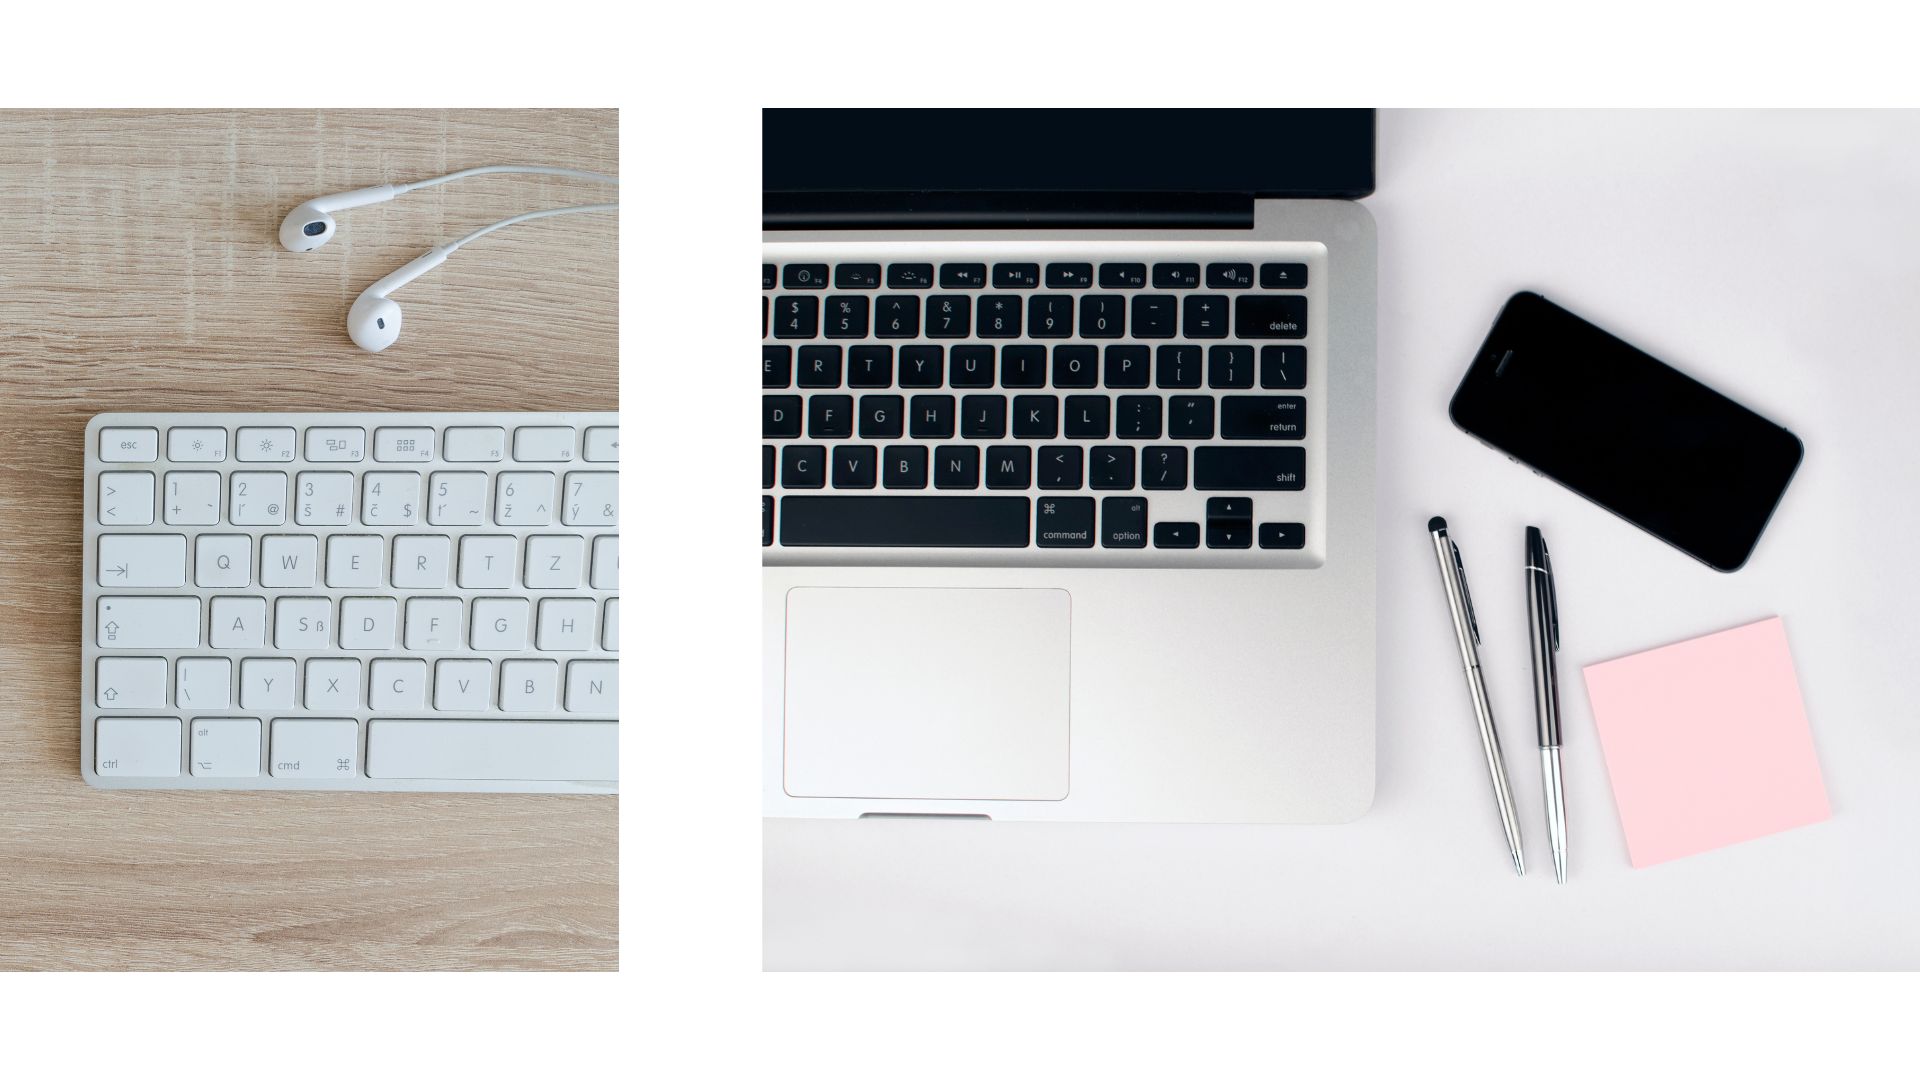
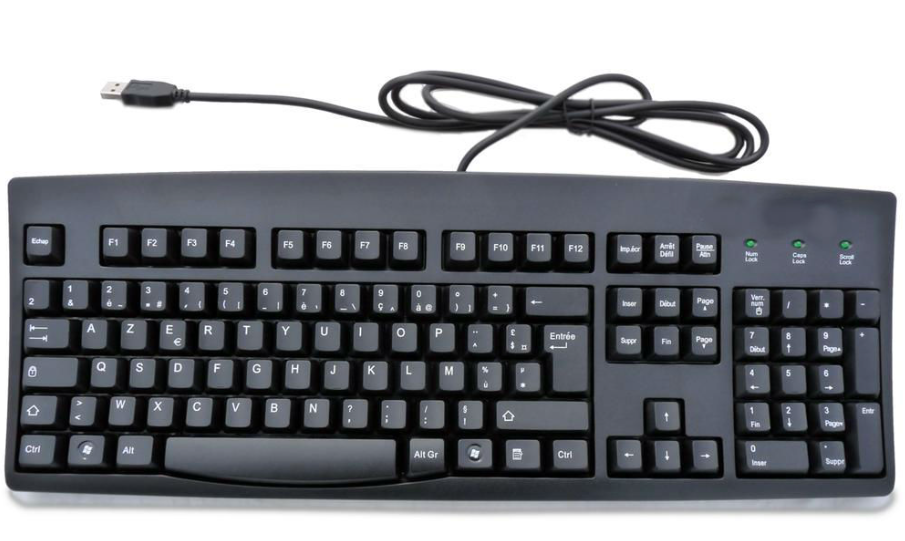
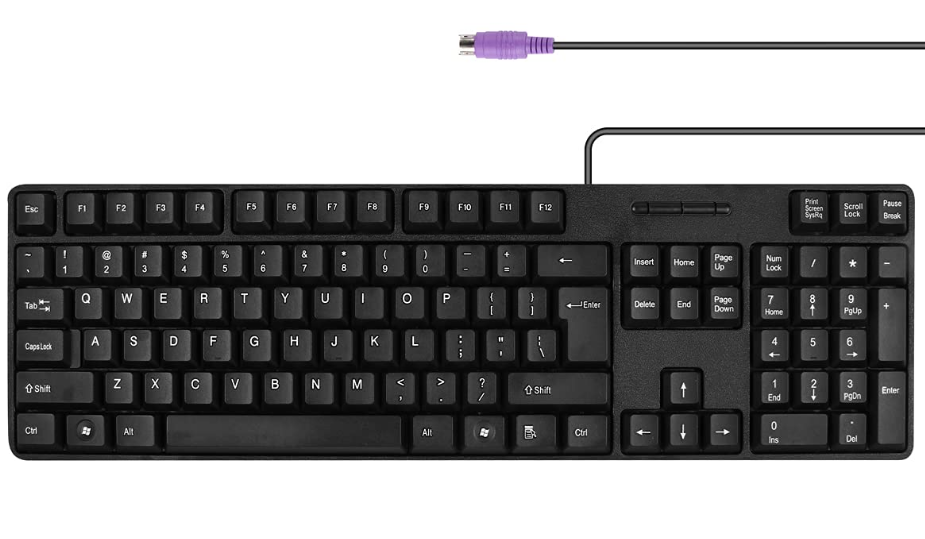
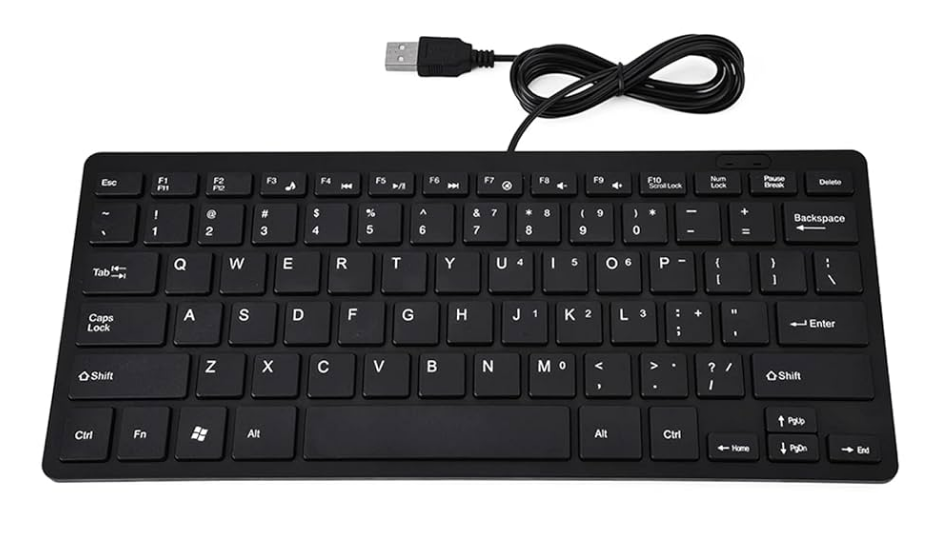
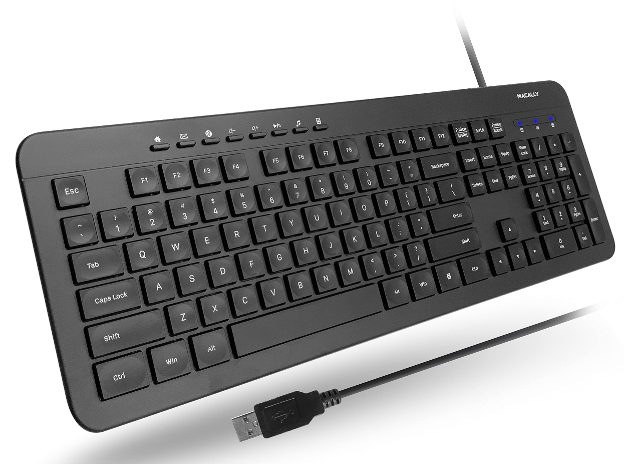
Universal Keyboard

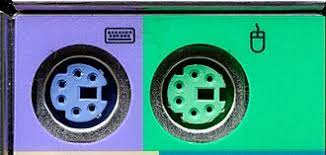
PS2 Keyboard All Pin Details :
| Pin Number | Description |
|---|---|
| 1 | Data |
| 2 | No Connection |
| 3 | Ground |
| 4 | +5V |
| 5 | Clock |
| 6 | No Connection |
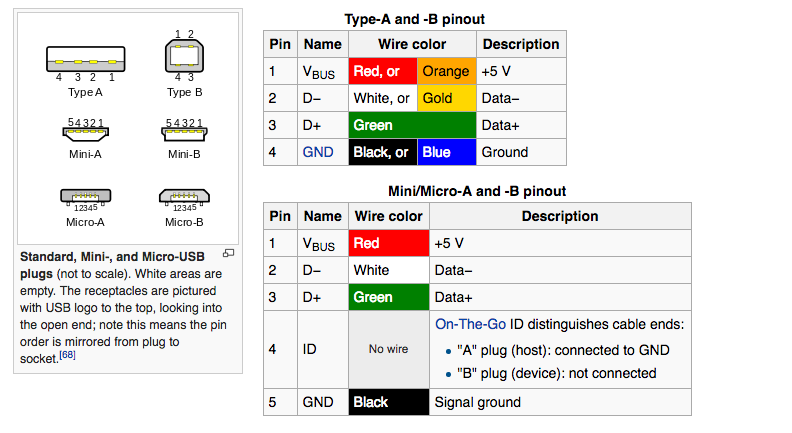
USB Keyboard All Pin Details
| Pin Number | Name | Purpose |
|---|---|---|
| 1 | Vcc | +5v Common Collector Voltage – Red |
| 2 | -Data | Clock Signal White |
| 3 | +Data | Clock Signal Green |
| 4 | GND | Ground – Black |
Keyboard : Keyboard एक Input Device होता है उसे Primary Input Device के रूप में Use करते हैं। Generation के अनुसार Keyboard दो प्रकार के होते हैं।
1 – At Keyboard
2 – Atx Keyboard
The main difference between AT and ATX keyboards lies in their physical connection and the technology they utilize.
Difference Between AT Keyboard and ATX Keyboard
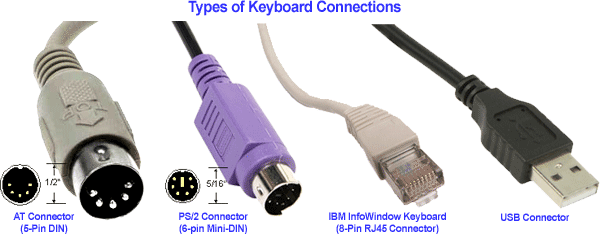
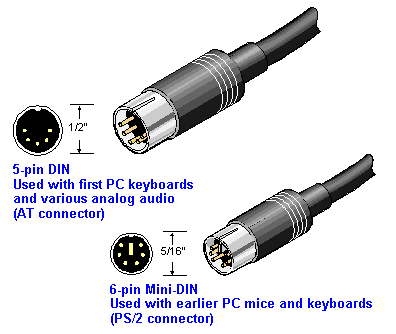
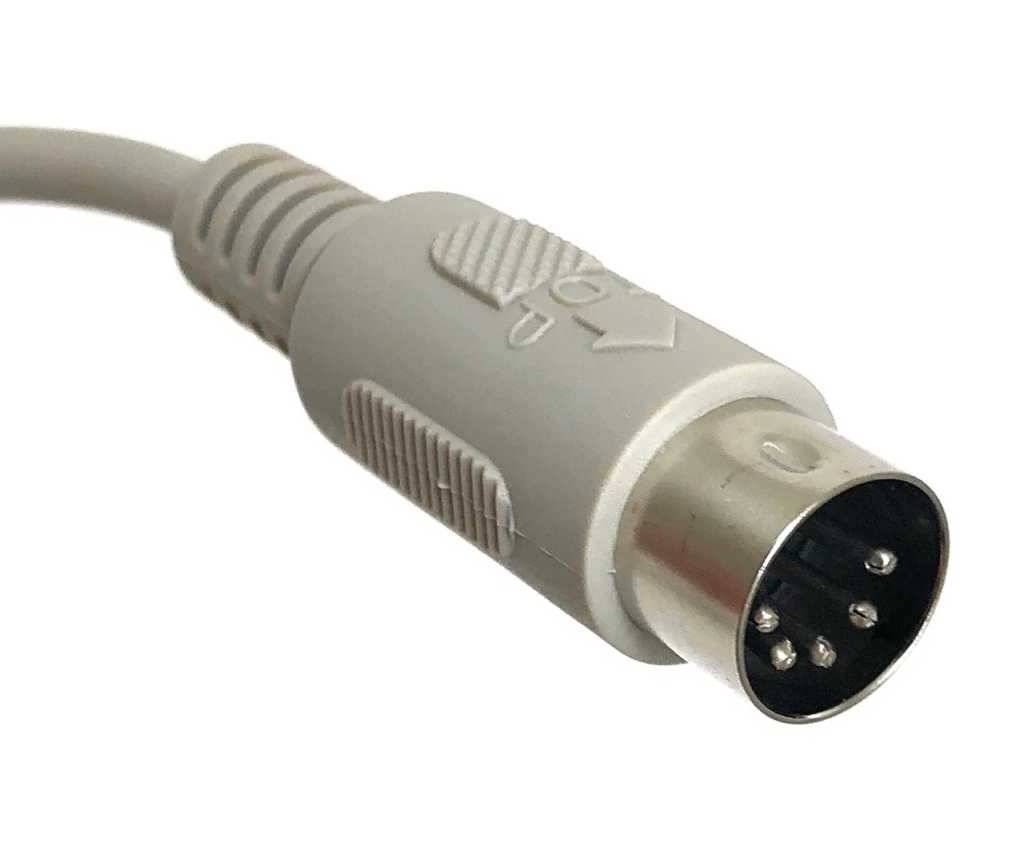
AT keyboards use a 5-pin DIN connector, while ATX keyboards use a 6-pin Mini-DIN connector, commonly known as a PS/2 connector. Additionally, AT keyboards are associated with older PC/AT systems, while ATX keyboards are part of the newer ATX standard.
Keybord And Mouse किसी भी Computer के Main Input Devices होते हैं। जिनका काम Computer के CPU तक Electronics Singal के रूप में Commands को पहुंचाने का काम करता है। ये मुख्य Basics Hardware Category में आते हैं।
Keyboard – Generation के अनुसार Keyboard कई तरह के आते हैं। यदि Connectivity के आधार पर देखें तो सबसे पहले At (Advance Technology) Keyboard आया करते थे। जिनकी मुख्य पहचान 5 Pin का गोल Input Connector से होता था।
At Keyboard का प्रयोग केवल Pentium 3 तक के Computer में ही प्रयोग होता था।
इसके बाद Atx Keyboard आये, जो पहले 6 Pin के गोल Input Connector के साथ आये और बाद में ये USB Connector के साथ आने लगे। अभी के समय में Atx Keyboard का ही प्रयोग किया जाता है।
Flexibiltiy के आधार पर देखें तो Keyboard दो तरह के होते हैं जैसे –
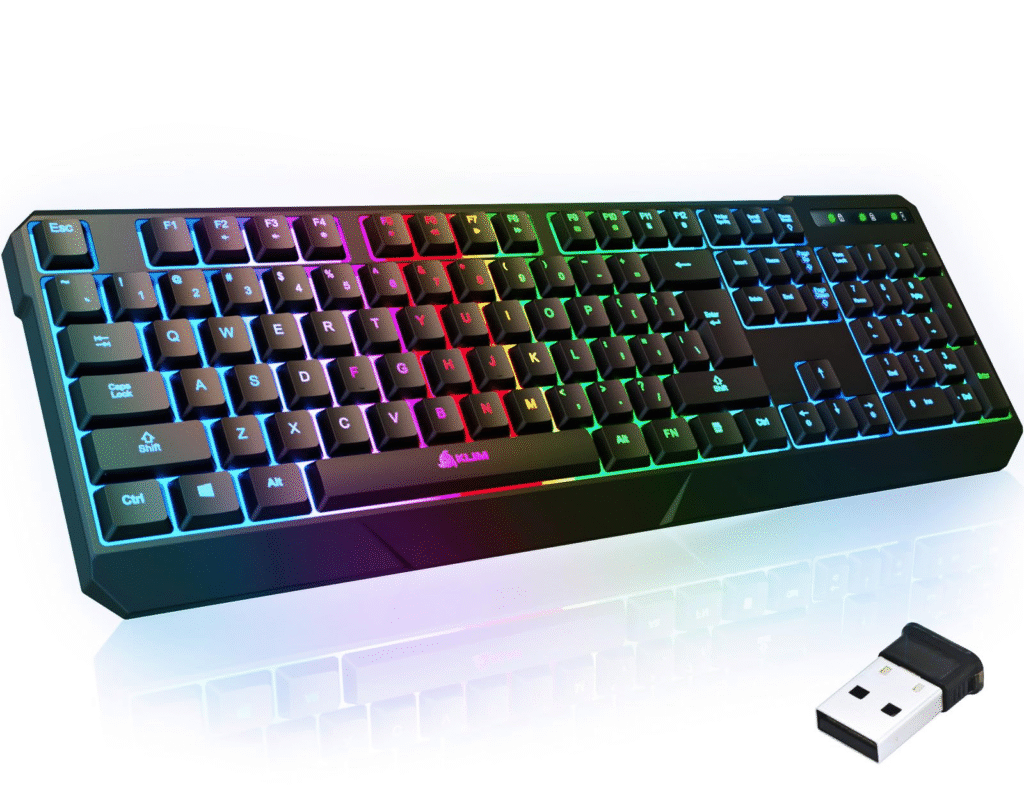
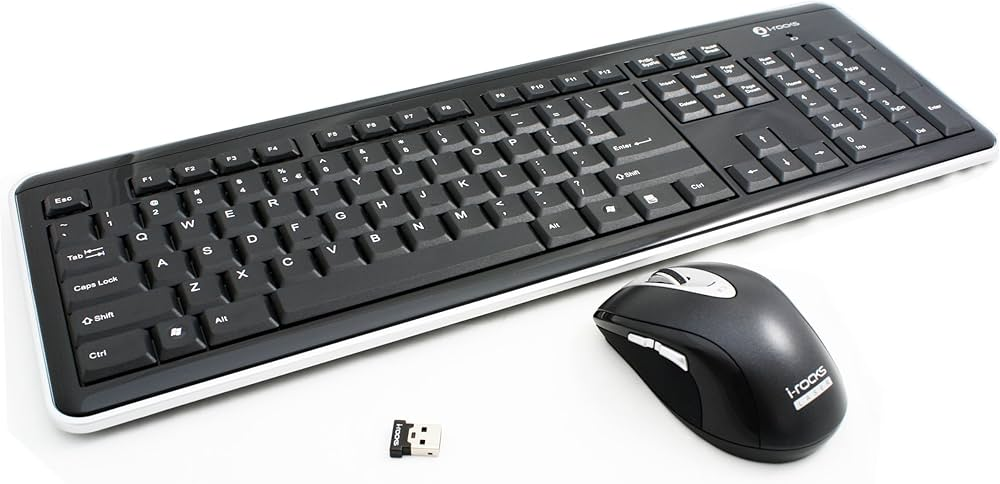
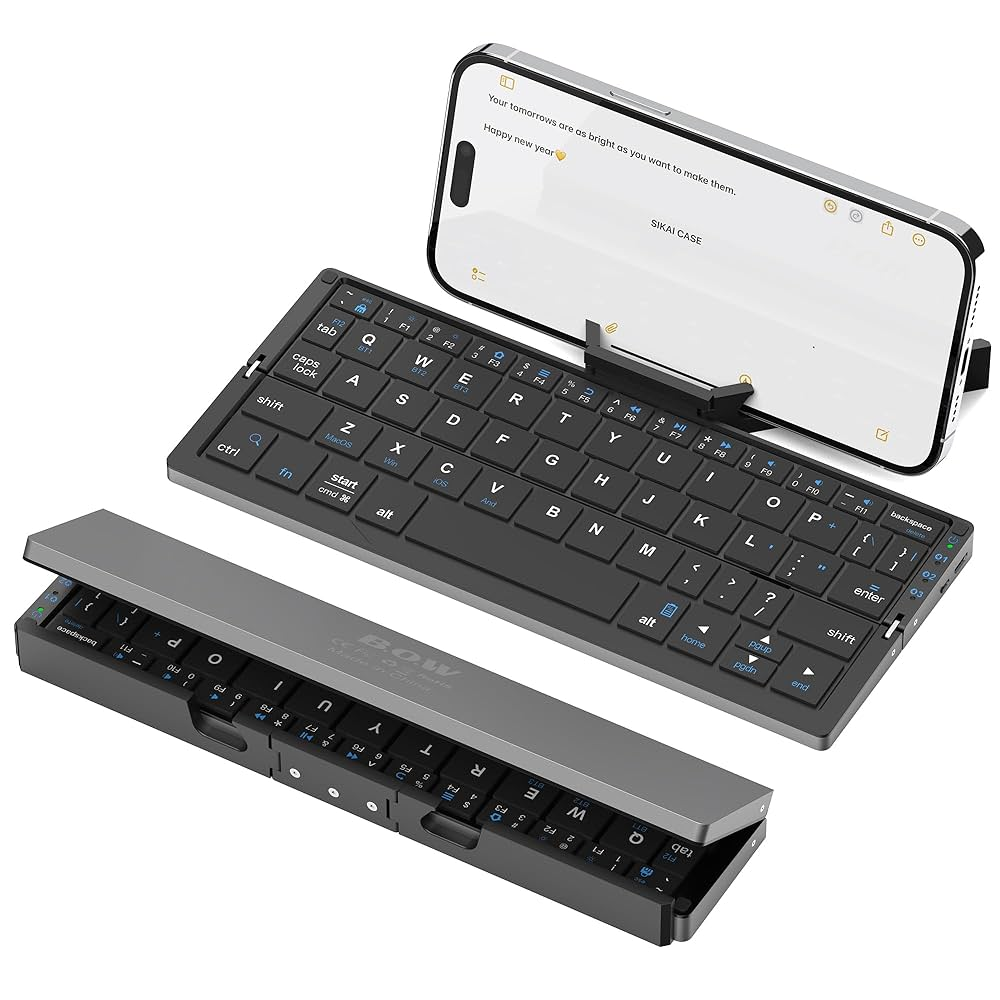
- Wire Keyboard
- Wireless Keyboard
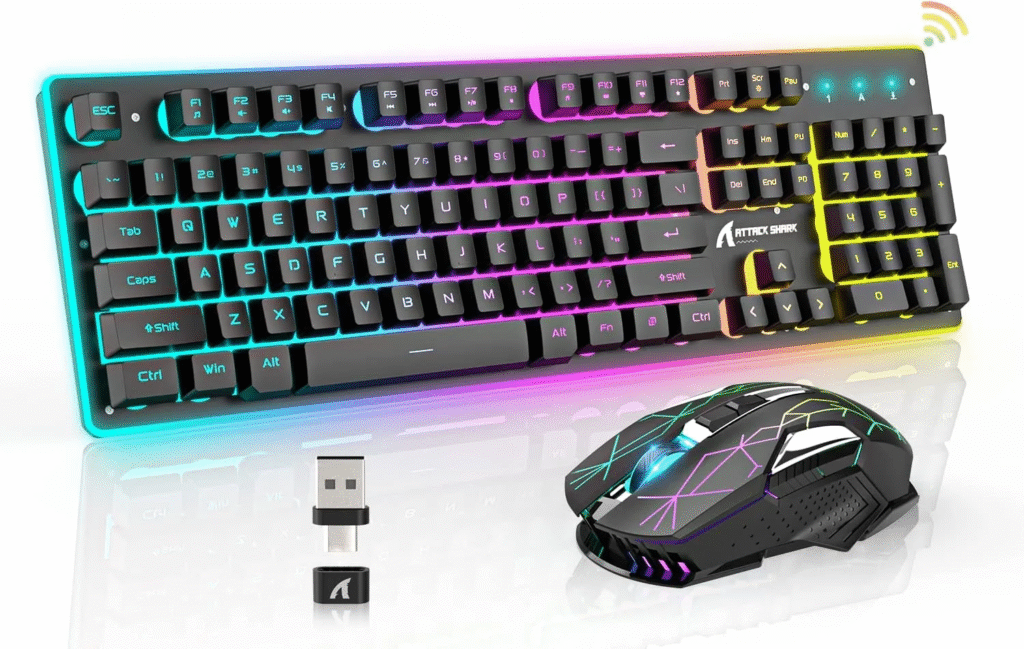
समय के साथ Latest Keyboard बिना Wire के भी बनने लगे। इसे Wireless Keyboard कहा जाता है। Wireless Keyboard को System से Connect करने के लिए Keyboard के साथ एक USB Dongle आती है। इस USB Dongle को Computer / Laptop में Connect कर दिया जाता है। Keyboard को Power देने के लिए Alkaline Aaa Battery का इस्तेमाल किया जाता है।
Some Types Of Keyboard :
Wireless Keyboard
Rf Keyboard
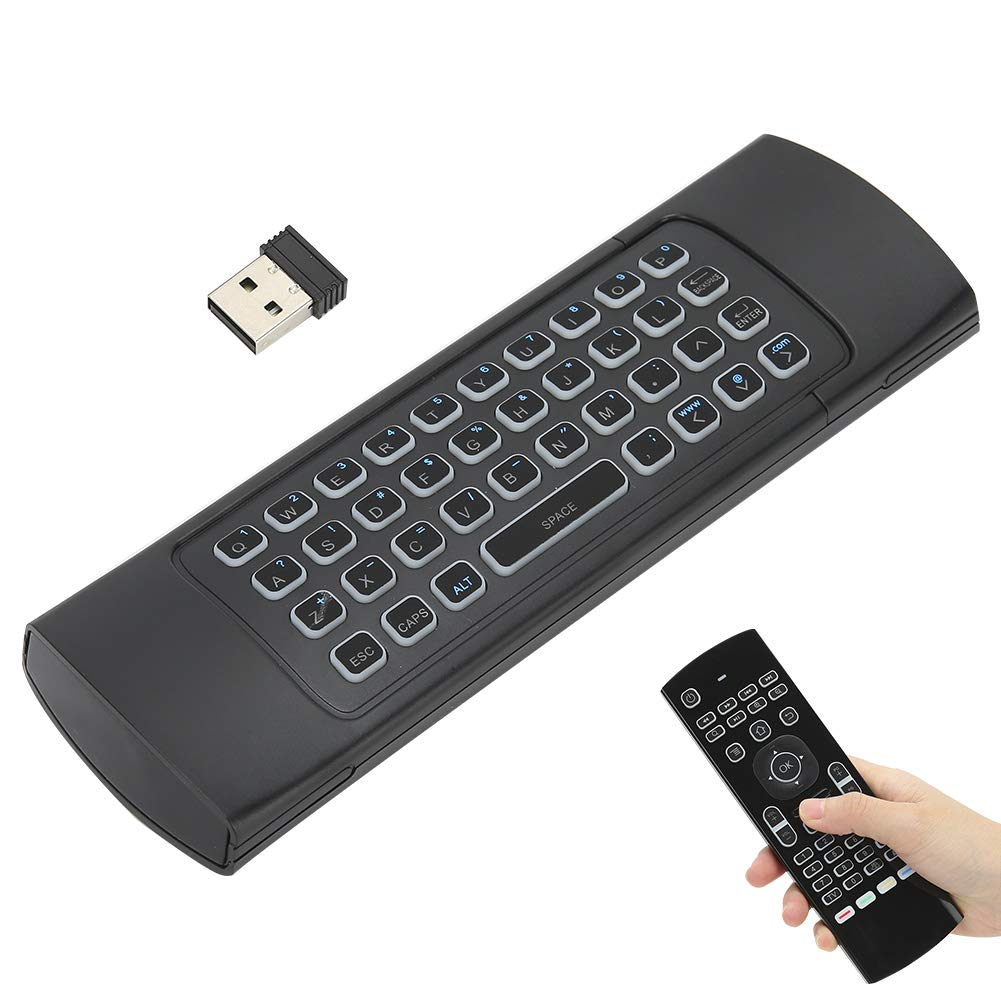
Infrared In Remote Keyboard
Bluetooth Keyboard
Keyboard Buttons :

Keyboard में Command Types करने के लिए बहुत सारे Buttons होते हैं। Normal Keyboard में 104 Buttons होते है। इन Buttons को अलग – अलग Category में Divide किया गया है।
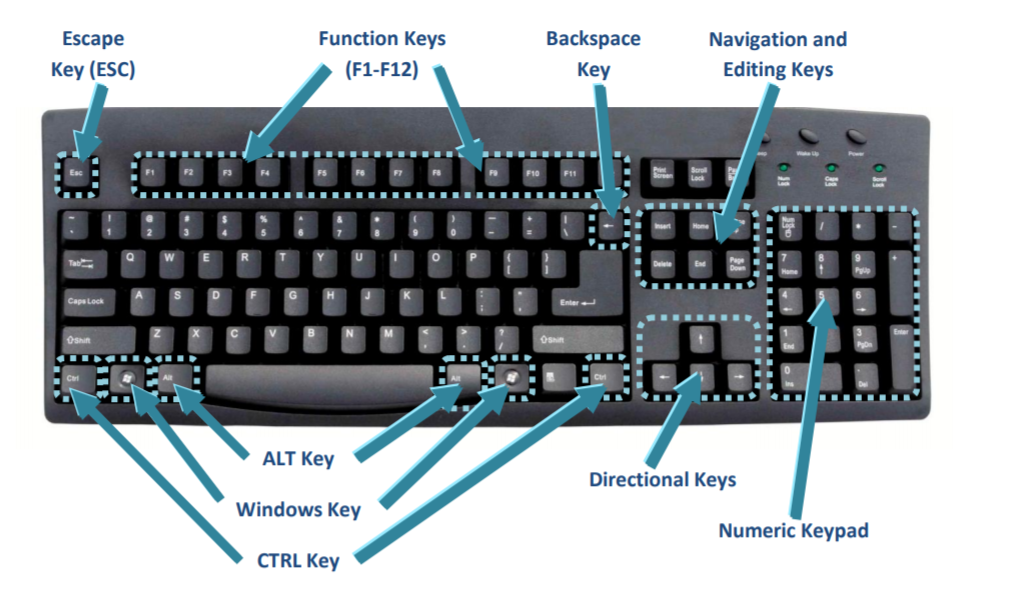
Alphanumeric Button – A To Z, 0 – 9.
Numeric – 0 To 9.
Moving / Navigation Button – Left, Up, Down, Right. Arrow Keys (↑ ↓ ← →), Home, End Page Up, Page Down, Insert, Delete.
Control Keys – Ctrl (Control), Alt, Shift, Fn (Function Key), Esc (Escape), Space Bar.
Function Button – F1 To F12.
Special Button – Shift, Ctrl, Alt, Caps Lock, Tab, Enter, Backspace, Num Lock, Windows Button, Scroll Lock, Home, End Etc.
Punctuation Button – ~, `, !, @, #, $, %, ^, &, *, (, ), _, -, +, =.
Media/Utility (On Function Row Or Dedicated) – Brightness Up/Down, Volume Up/Down/Mute, Play/Pause, Skip Forward/Back, Airplane Mode, Screen Lock, Keyboard Backlight Toggle.
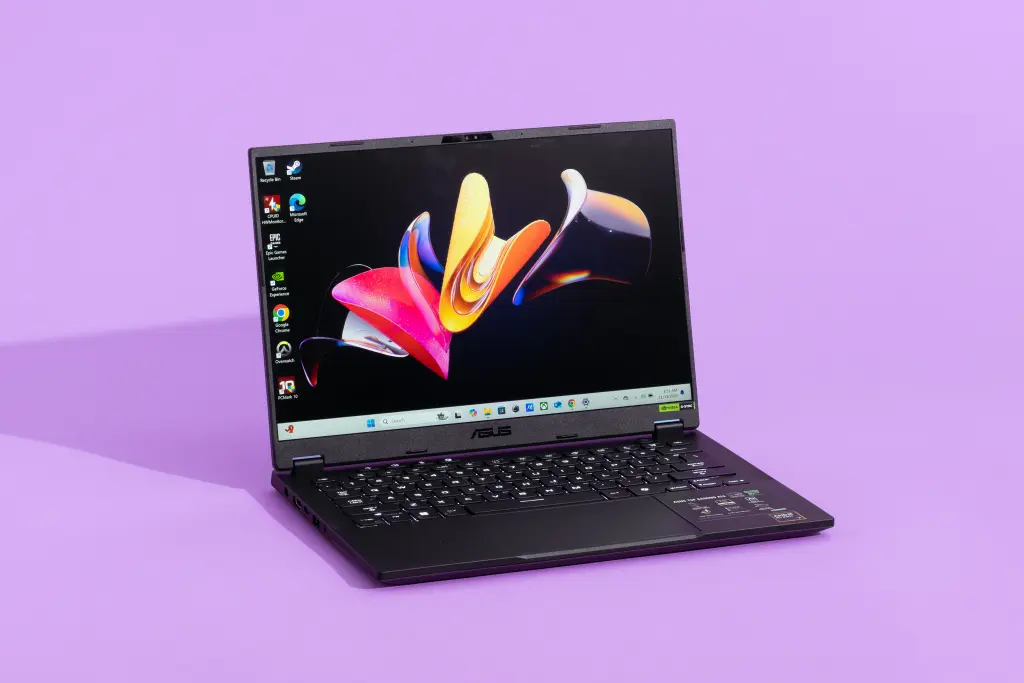
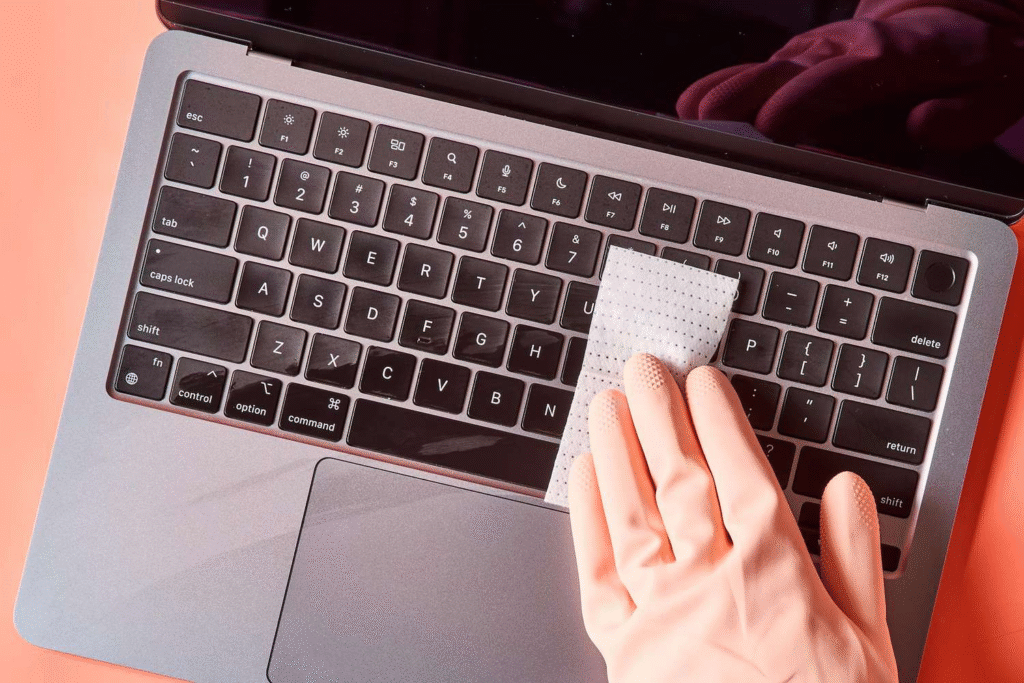
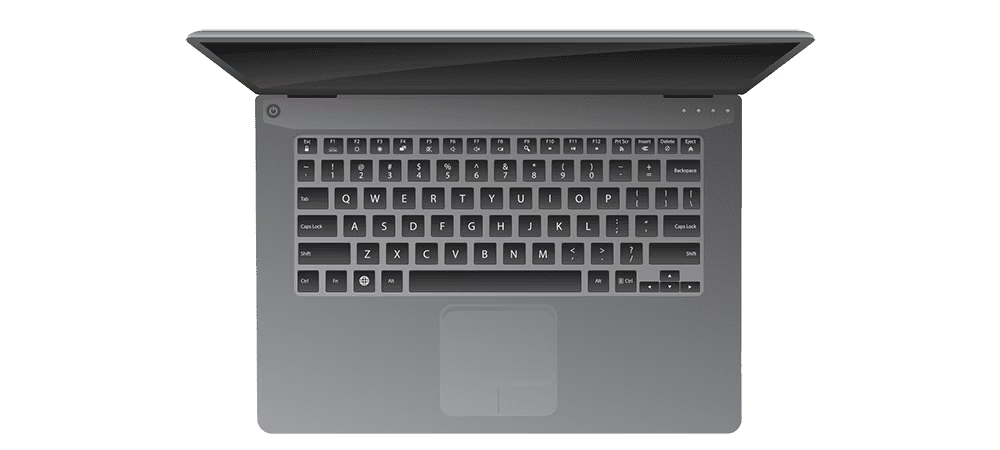
Laptop Keyboard
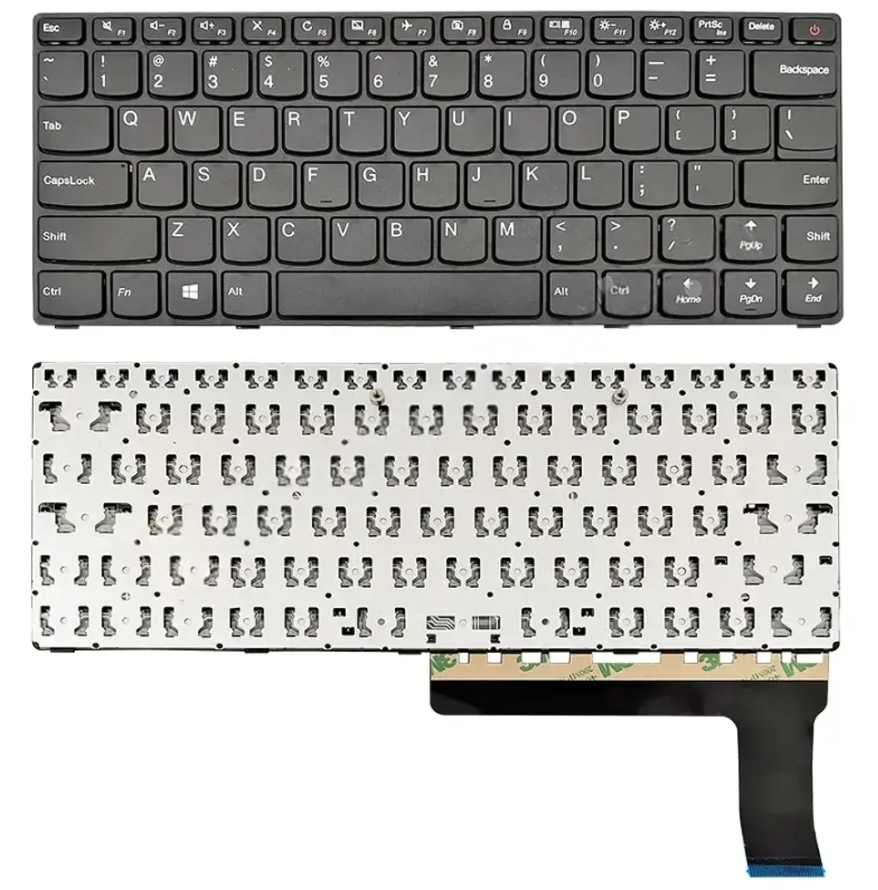
Computer में USB के माध्यम से Keyboard का इस्तेमाल किया जाता है। इस तरह के Keyboard को External Universal Keyboard बोलते हैं। Laptop Device में Inbuild Keyboard मिलते हैं।
यानी की Keyboard, Motherboard से Internally Connect होता है, जिसे एक Technicians Replace कर सकता है, अन्यथा Laptop Damaged हो सकता है।
Laptop में Multimedia Keyboard का Use होता है। जिसमें Number Of Button And Connector Pins की संख्या अलग-अलग मिल जाती है। यह With Numeric Key And Without Numeric Key मिल जाते हैं।
कुछ New Series And Old Series Laptop Keyboard में Power Button उसी के साथ दिए हुए होते हैं।
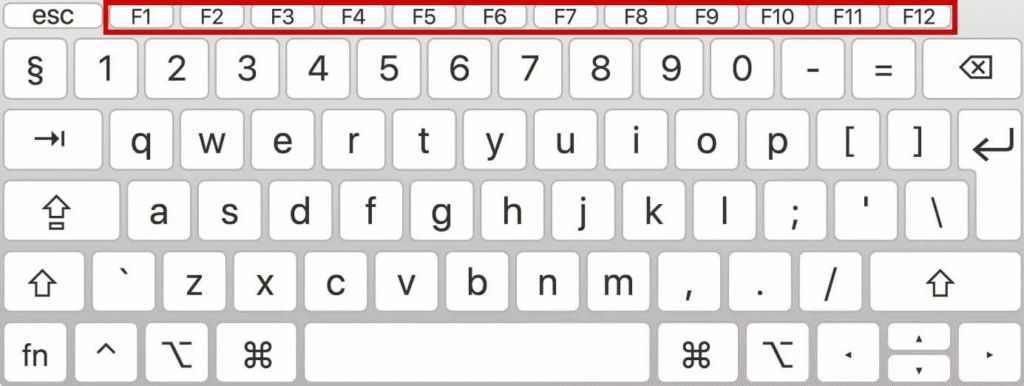
Laptop Keyboard में Function Key (F1 To F12) के साथ Moving Key के साथ एवं कुछ Special Key के साथ एक Second Option भी दिया होता है। जिसे Use करने के लिए Laptop Keyboard में एक अलग से Function Key (Fn) Button होता है। जिसकी मदद से हम Second Option को Use कर सकते है।
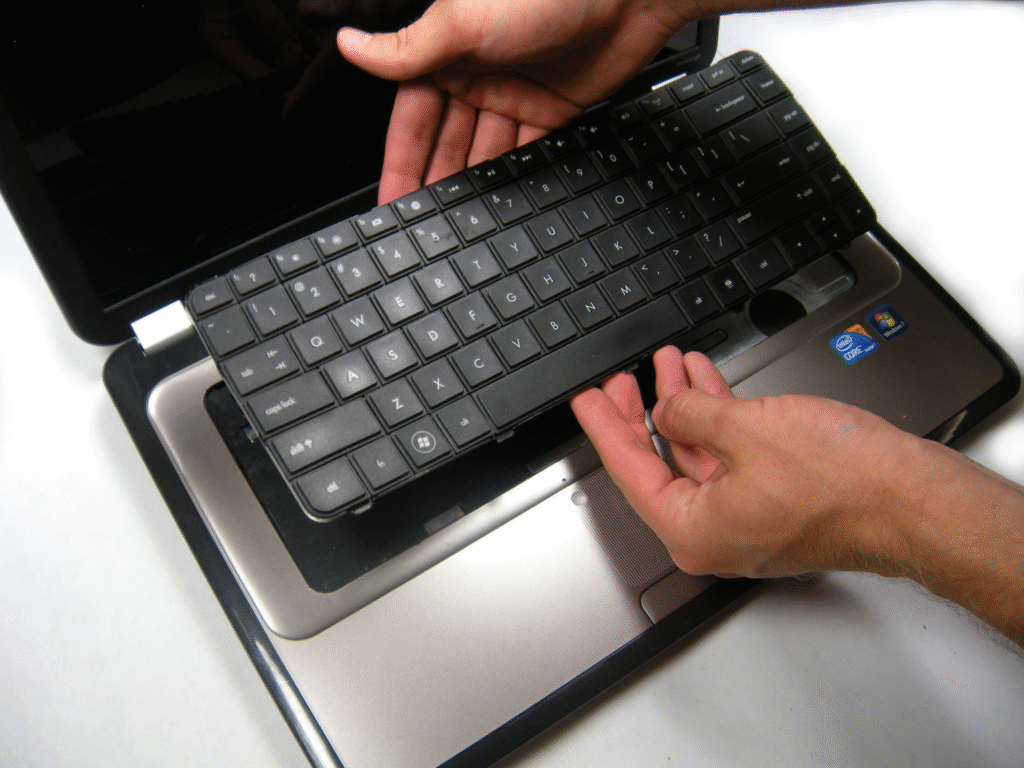
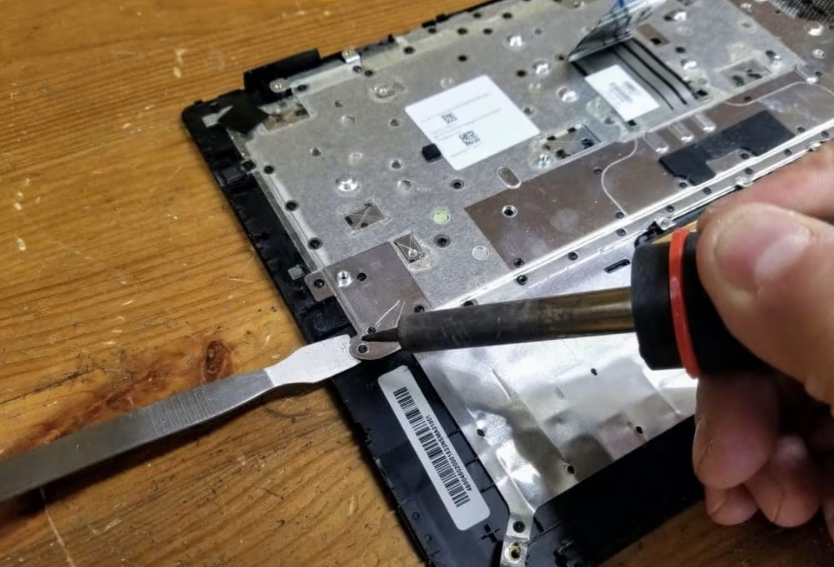
Laptop में हमें Mostly Top Side से Remove होने वाले Keyboard दिए होते हैं। जबकी बहुत सारे New Series Laptop में हमें Mostly Internal Side से Remove होने वाले Keyboard दिए होते हैं।
Laptop Keyboard Pin Connector क्या होता है?
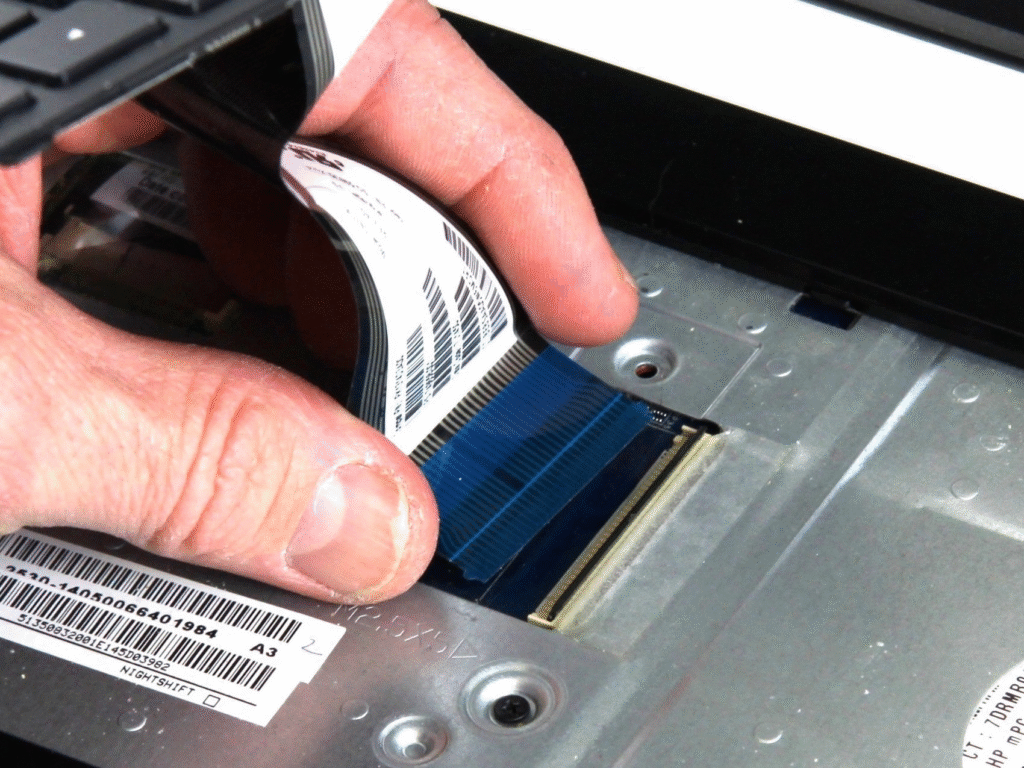
लैपटॉप कीबोर्ड में पिन कनेक्टर वह हिस्सा होता है जिससे कीबोर्ड का डेटा और पॉवर मदरबोर्ड तक पहुँचता है। यह एक फ्लैट और पतली केबल (जैसे Flex Cable या Ribbon Cable) होती है जो एक खास कनेक्टर में लगती है जिसे हम Zif Connector कहते हैं।
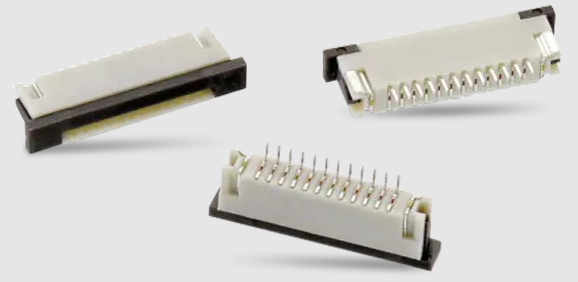
Connector के प्रकार (Types of Keyboard Connectors) :
| Types (प्रकार) | Descriptions (विवरण) |
|---|---|
| Zif (Zero Insertion Force) | सबसे कॉमन, कीबोर्ड को बिना ज़्यादा दबाव लगाए जोड़ सकते हैं। |
| Lif (Low Insertion Force) | थोड़ा पुराना, दबाकर फिट करना होता है। |
| Soldered Connector | कुछ पुराने या अल्ट्रा-स्लिम लैपटॉप में Directly Motherboard से जुड़े होते हैं। |
Zif Connector कैसे काम करता है?
- इसमें एक Lock या Clip होता है जिसे हल्के से उठाकर या स्लाइड करके खोलते हैं।
- फिर कीबोर्ड की Flex Cable को अंदर डालते हैं।
- फिर Lock को नीचे दबाकर Cable को Secure कर देते हैं।
Pin Count क्या होता है?
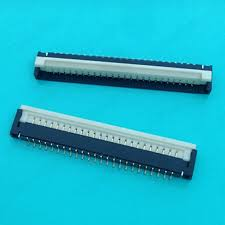
कीबोर्ड की Flex Cable में अलग-अलग Number Of Pins हो सकते हैं।
| Size | Use |
|---|---|
| 24-Pin | Basic कीबोर्ड |
| 30-Pin | ज्यादा फीचर्स वाला कीबोर्ड (Backlight आदि) |
| 40+ Pin | High-End लैपटॉप (Rgb, Multi-Functions आदि) |
हर लैपटॉप मॉडल के कीबोर्ड के पिन्स का Pattern अलग हो सकता है।
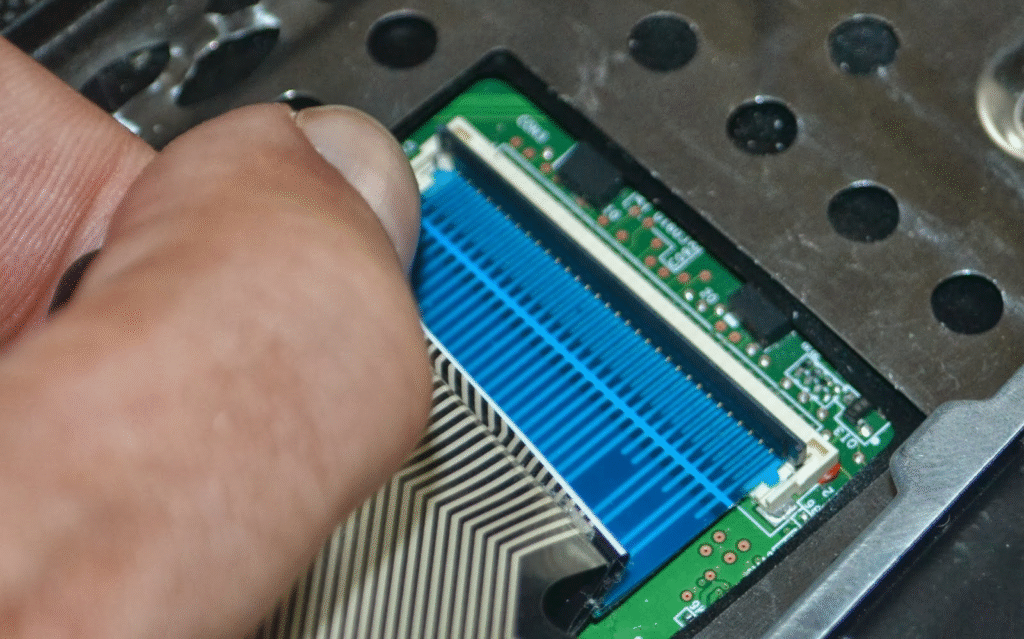
Keyboard Cable पहचान कैसे करें?

- Flat और पतली होती है
- उस पर Silver/Golden Lines दिखती हैं (Conducting Paths)
- Connector के पास Pin Number लिखा होता है (जैसे: 30-Pin)
Laptop Keyboard Replace या चेक करते समय सावधानी :
- Power Off करें और बैटरी निकालें।
- Static Electricity से बचने के लिए Grounding करें।
- Connector को धीरे से खोलें – जोर से न खींचें।
- सही Orientation में Flex Cable लगाएं।
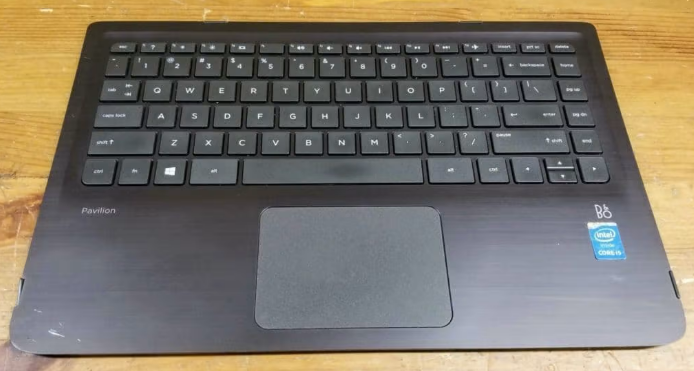
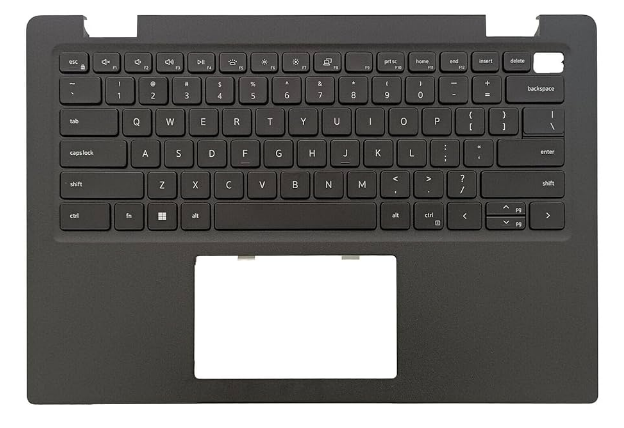
Laptop Keyboard With Top Case Attached

Laptop keyboard with top case का मतलब है कि लैपटॉप का कीबोर्ड अलग पार्ट के रूप में replace नहीं होता, बल्कि upper body panel (जिसे palmrest assembly भी कहते हैं) के साथ fixed आता है।
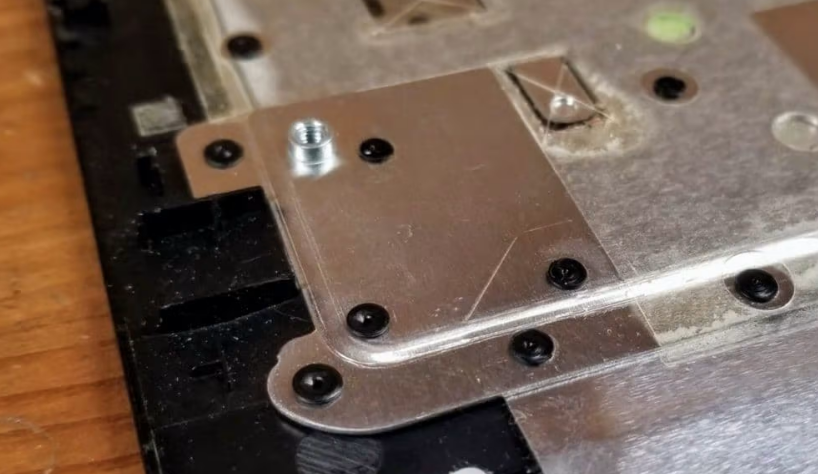
ये design ज़्यादातर उन laptops में होता है जहाँ keyboard को plastic rivets या heat weld से attach किया जाता है, जिससे इसे अलग निकालना मुश्किल हो जाता है।
Top case में क्या-क्या होता है?
- Keyboard (full size या compact)
- Touchpad / Trackpad (कभी अलग replace होता है, कभी same panel में)
- Power button area
- Speaker grill (अगर design में दिया हो)
- Upper frame का plastic या metal body
क्यों use होता है keyboard with top case?
- Durability – Rivets और welding से keyboard मजबूत रहता है।
- Manufacturing cost कम – अलग-अलग parts बनाने के बजाय एक ही assembly बनती है।
- Easy replacement – पुरानी assembly हटाकर नई fit करना आसान होता है।
Replacement Process – Step by Step
Tools required: Precision screwdriver set, plastic prying tool, anti-static wrist strap.
- Laptop power off करो
- Charger disconnect करो।
- अगर removable battery है तो निकाल लो।
- अगर internal battery है तो bottom cover खोलकर battery connector remove करो।
- Bottom cover remove करो
-
- सभी screws निकालकर safe जगह पर रखो।
- Plastic opening tool से cover gently open करो (metal tool से scratches आ सकते हैं)।
- Internal cables disconnect करो
- Keyboard ribbon cable को motherboard से remove करो (lock flap उठाकर)।
- Touchpad, power button, speaker या fingerprint sensor के cables भी disconnect करो।
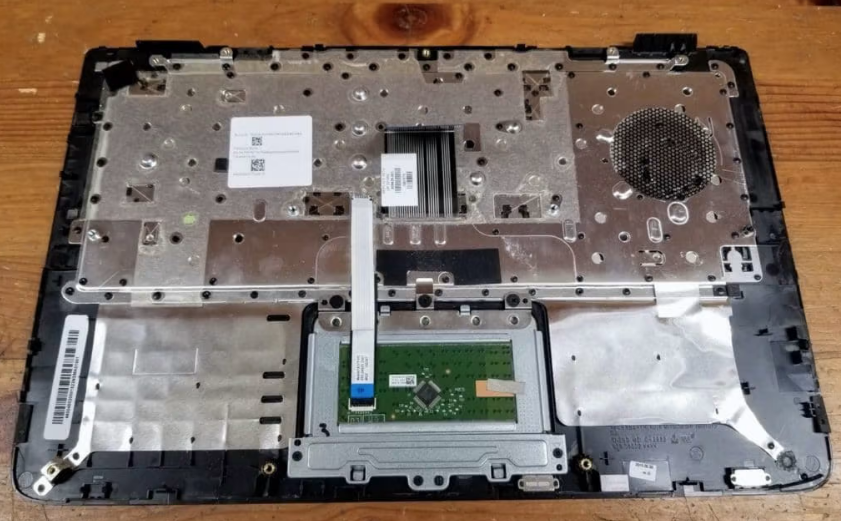
- Motherboard और components remove करो (अगर ज़रूरत हो)
- कुछ laptops में top case motherboard के नीचे होता है, तो motherboard, fan, heatsink, battery सब निकालना पड़ेगा।
- Top case remove करो
-
- Remaining screws खोलकर top case को body से अलग करो।
-
- Plastic tool से gently pry करो।
- New keyboard + top case install करो
-
- नया assembly fit करो, screws tight करो।
- सारे ribbon cables carefully reconnect करो।
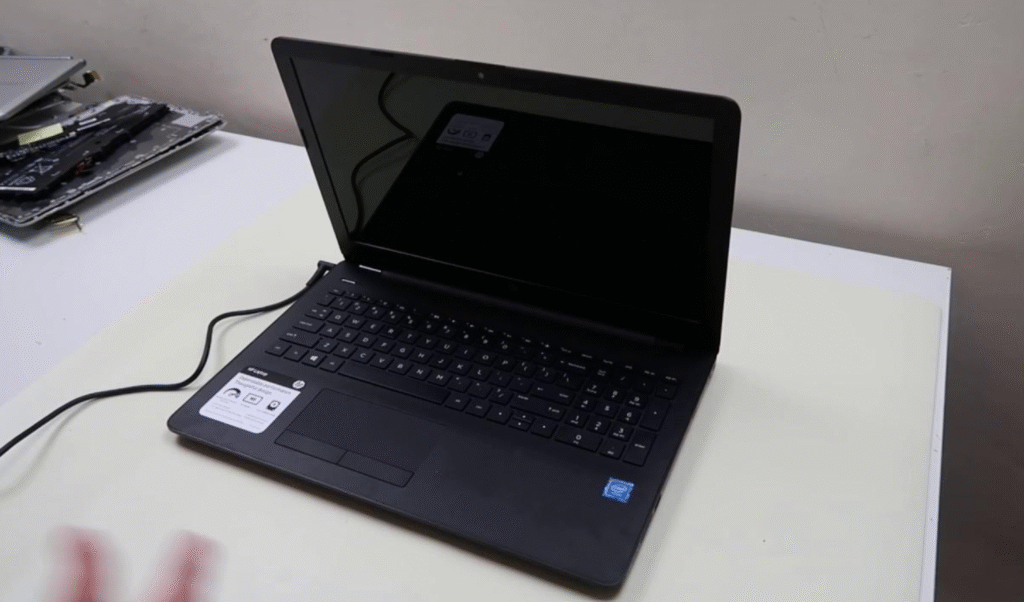
- Laptop reassemble करो
-
- Bottom panel लगाओ, battery connect करो।
- Power on करके test करो कि keyboard, touchpad और power button सही से काम कर रहे हैं।
Tip: अगर keyboard अलग मिल जाए तो सिर्फ keyboard replace करना cheap पड़ता है, लेकिन keyboard with top case का replacement easy और safe होता है क्योंकि इसमें rivets cut करने का tension नहीं रहता।
कैसे पता करें कि आपके लैपटॉप में कौन सा कीबोर्ड सपोर्ट करेगा?
Laptop का Model Number जानें।
- सबसे पहले अपने लैपटॉप का Exact Model Number पता करें।
- यह जानकारी आपको यहाँ मिल सकती है –
- लैपटॉप के नीचे स्टिकर पर।
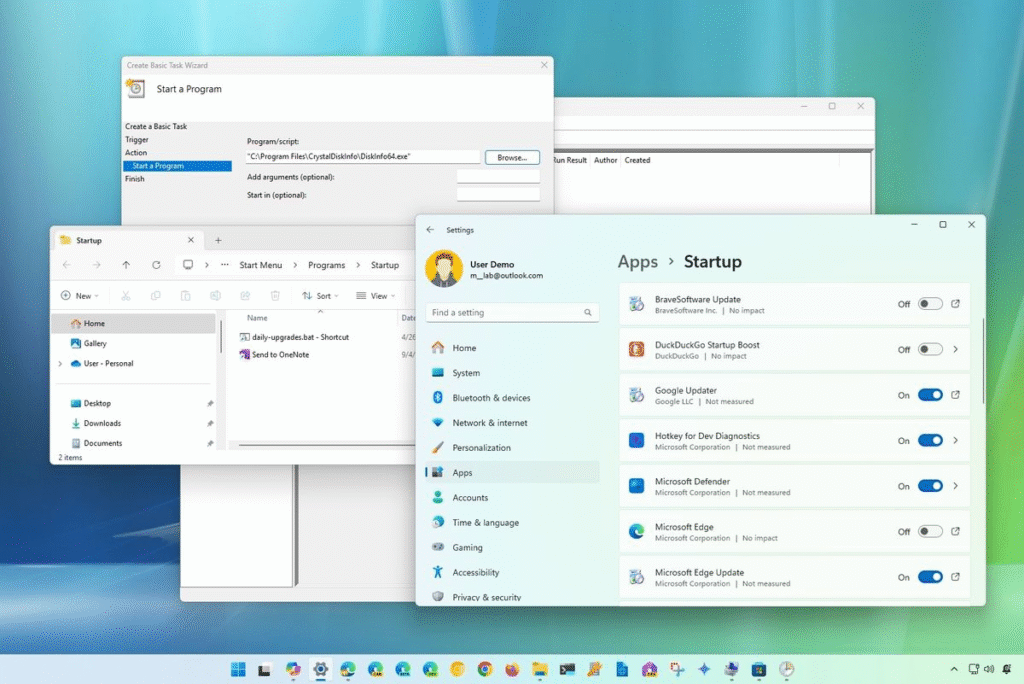
- System Information में (Windows + R → Msinfo32)
- Bios में (Start → F2 या Del दबाकर)
उदाहरण: Hp 15s-Du1065tu, Dell Inspiron 3542, Lenovo Ideapad 330
Manufacturer Website या Manual देखें।
- अपने लैपटॉप मॉडल के लिए ऑफिशियल वेबसाइट पर जाएँ।
- वहाँ आपको मिलेगा:
- Spare Parts List
- Compatible Keyboard Model Number
- Pin Configuration और Layout जानकारी।
पुराना Keyboard खोलकर Check कर सकते हैं।
अगर आप थोड़े टेक्निकल हैं या टेक्नीशियन की मदद ले सकते हैं, तो ये सबसे पक्का तरीका है।
Check करें:
- Flex Cable पर लिखा हुआ Part Number
- कितने Pins हैं (30-Pin, 40-Pin आदि)
- Backlight है या नहीं?
- Size और Screw Location Match करता है या नहीं?
Backlit Keyboard Precautions :

Note: कुछ लैपटॉप में Backlit और Non-Backlit दोनों Keyboard Supported होते हैं लेकिन Motherboard में Backlight Pin होना चाहिए, तभी Backlight Keyboard उस Motherboard अच्छे से काम करेंगे।
Keyboard Layout Match करें।
Layout देखना ज़रूरी है:
-
- Enter Key का आकार
- Fn Key Location
- Power Button Keyboard में है या अलग?
- Language (Hindi/English/Us/Uk)
Online Part Sites या Seller से Confirm करें
आप Amazon, Flipkart या [Laptop Spare Part Websites](Https://Www.Laptex.In, Https://Www.Partsbaba.Com) पर Model नंबर डालकर Exact कीबोर्ड खोज सकते हैं।
खरीदने से पहले Seller से पूछें:
“Is This Keyboard Compatible With My Laptop Model?”
“क्या यह Keyboard मेरे Laptop में Comptaible है, या यह कहिये की मेरे Laptop (Model Number) के लिए Keyboard चाहिए।”
एक Example:
आपके पास है: Dell Inspiron 15 3542
Compatible Keyboard:
- Dell Part Number: 04x8w8
- 30-Pin Zif Connector
- Non-Backlit / Backlit दोनों Options मिलते हैं।
- Standard Layout
Bonus Tip :
अगर आपको Exact Match नहीं मिल रहा है, तो आप Keyboard का Part Number लेकर उसे Google में या Youtube में सर्च करें:
“Dell 3542 Keyboard Replacement Tutorial”
इससे आपको Visually समझ आएगा कि कौन सा कीबोर्ड Match करता है।
Note : इन्ही तरीको को Follow करके आप Laptop के और भी अन्य Parts जैसे की Laptop Speaker, Laptop Display, Laptop Motherboard, Laptop Touchpad, Laptop Battery, Laptop Charger, Laptop Web Camera, Laptop Wifi Card इत्यदि को Change कर सकते हैं।
Fault Coming From Keyboard :
No Power On –
Laptop में No Power On की Problem आने पर इसकी एक वजह Keyboard भी हो सकती है। इस Condition में सबसे पहले Laptop के Battery को Remove करके Keyboard को Disconnect करेंगे और Adapter के द्वारा Laptop को On करके Check करेंगे।
यदि Laptop पूरी तरह से On हो जाती है तो Problem Keyboard की होगी। तब हम एक बार Keyboard को Replaced कर देंगे या फिर Keyboard के Connector को Motherboard से Remove कर देंगे।
Files And Folder Automatically Delete When Select –
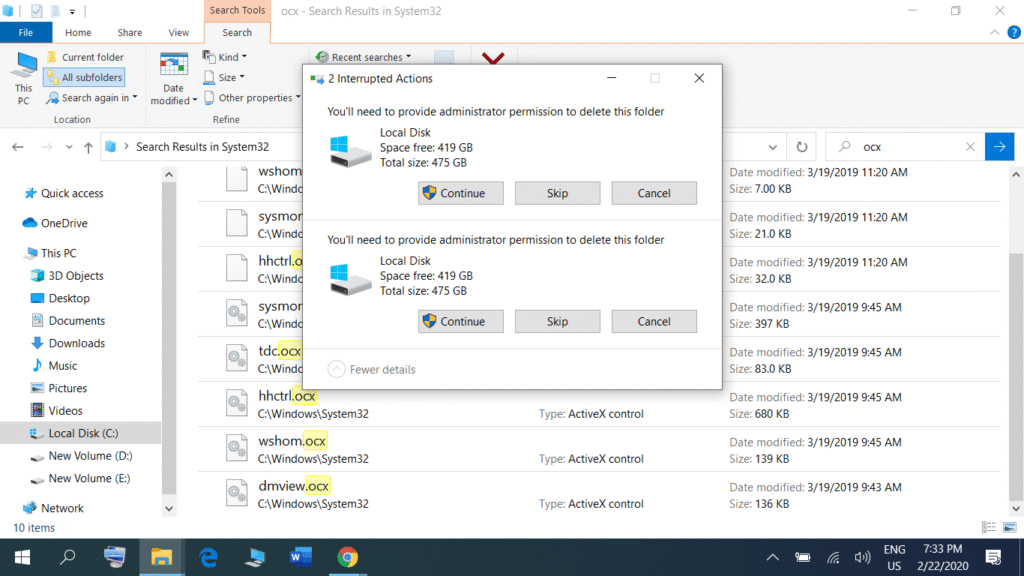
किसी File और Folder को Select करने पर Automatically Delete हो जाता है तो इस Condition में Keyboard का Delete Button को Check करेंगे। अक्सर Delete Button Short रहने से File को Select करने के बाद यह Automatically Delete हो जाता है।
इसके लिए Delete Button के Lock को Unlock करेंगे। आप Delete Button को बार – बार दबा कर देखें की यह ठीक से काम कर रहा है या नहीं। ठीक से काम नहीं करने पर Delete Button को Keyboard से निकाल कर इसके Rubber Cap को Clean करेंगे। Clean करने के बाद भी अगर Problem Same रहती है तो फिर पुरे Keyboard को Replaced करेंगे।
Continue Beep Coming From Laptop When Laptop Start –
Laptop On करते ही या लैपटॉप चालू होने पर Continious On हो रहा हो Display भी आ रहा हो लेकिन साथ में Continious Sound Beep दे रहा है। हो तो इस केस Mostly Fault Keyboard का होता है। Keyboard Disconect कर के देख लें। अगर Problem Keyboard का है तो Keyboard Change करना होगा। वैसे एक बार इसकी Service कर के देख सकते हैं। तथा Keyboard Change करना नहीं है तो Disconect कर के बाहरी Keyboard को चला सकते हैं।
Laptop को Start करने पर लगातार Beep Sound आने लगती है तो इस Condition में Keyboard की Button आपस में Short कर रही होती है। इसे Confirm करने के लिए Keyboard को Laptop से Disconnect करके Laptop को Start करेंगे। इस बार Beep Sound नहीं आती है तो Keyboard की Problem है, आप Keyboard को Disconnect छोड़ सकते हैं या Keyboard को Replace करें।
Automatically Bios Setup Open When System Power On –
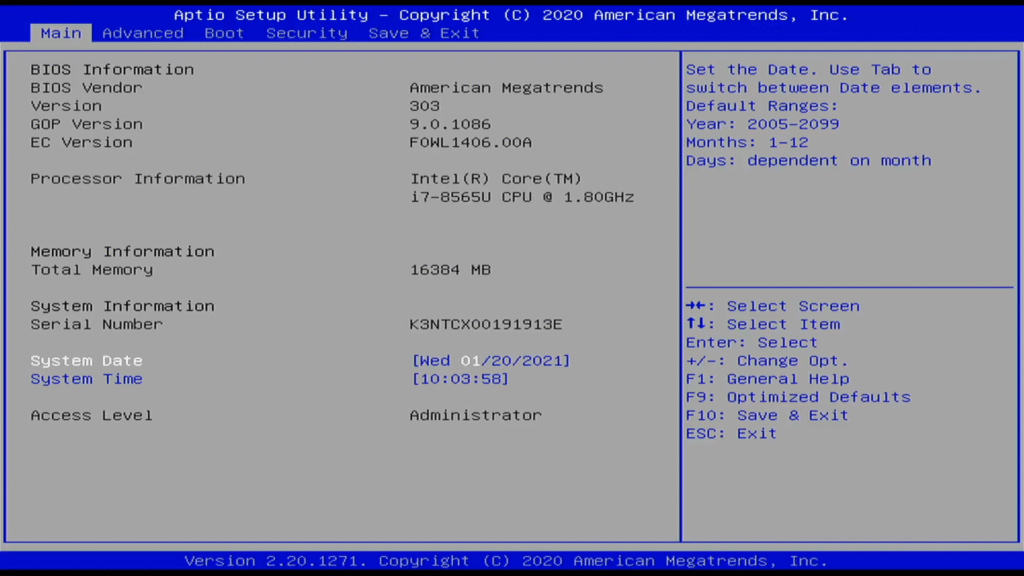
System Start करने पर Automatically Bios Setup Launch हो जाता है तो इस Condition में इस System के लिए जो Bios Button है वह Button Short कर रही होती है।
इसे Solve करने के लिए Button को Unlock करेंगे और Rubber Cape को Clean करेंगे। Problem फिर भी रहती है तो Keyboard को Remove करके System को On करके देखेंगे। अगर इस Baar Computer में Automatic Bios, Open नहीं होती है तो Keyboard को Replaced करेंगे।
Automatically Functions Happening In Laptop.
कई बार अगर आपके Keyboard खराब है तो आपके Laptop में Automatically कई और Keypad खुद ब खुद Types होने लगते हैं। दरशल Keyboard के Button के आपस में Short कर रही होती है। इसके साथ ही Files खुद ब खुद Select हो जाना, Screen Zoom Out, Zoom In, Automatic Text And Numbers Type, Incorrect Spelling Types इत्यादि की समस्या Keyboard से होती है।
ऐसे में अपने Laptop के Internal Keyboard को या तो Replace करें, या फिर Disconnect करें। हालाँकि आप एक बार Keyboard को अच्छे से Clean करके भी देख सकते हैं। उसके लिए Keyboard Button को निकालकर अच्छे से साफ़ करके वापस से लगा के देखें, या एक बार जोड़ से दबा कर के देखें। हालाँकि यह तरीका ज्यादा दिन तक काम नहीं करता है।
Some Buttons Not Working
Keyboard Working हो लेकिन उसका कुछ बटन काम नही कर रहा हो इस केस में Keyboard को खोलकर डाटा कनेक्टींग पिन को रबड़ से साफ करके देख लें। या Keyboard के Buttons को Clean करके देखें। आप Keyboard को खोलकर उस Rubber Cap को अच्छे तरीके से लगा दें।
External Keyboard सही रहना पर Computer में ठीक से काम नहीं करना।
कई बार कोई Keyboard सही तो रहता है लेकिन किसी Computer में वह काम नहीं करता है। इसमें से एक मुख्य कारण Earthing भी हो सकती है। Problem Earthing की है इस चीज़ को Confirm करने के लिए आप Computer के Cabinet को Touch करें और फिर Keyboard के Buttons को Press करें। अगर Computer Body से आप Connected रहे तब Keyboard काम करता है तो ऐसे में आप Computer को Earthing दें।
आप अपने घर के Electric Board में Earthing दे सकते हैं। या फिर Keyboard के USB में मोटी Wire को लपेट दें। उसके बाद दूसरे सिरे को किसी Metal Body में लपेट दें, जिससे की Computer में Earthing की समस्या दूर हो जायेगी। और आपका Keyboard Work करने लगेगा।
हालांकि किसी – किसी Laptop में Driver की समस्या के कारण भी Keyboard काम नहीं करता है। ऐसे में Operating System बदल कर देखें और Windows 10 का इस्तेमाल करें। ऐसा समस्या आपको Windows 7 Ultimate Version में देखने को मिल सकता है। आप Windows 7 में Professional Version को Install करके देख सकते हैं।